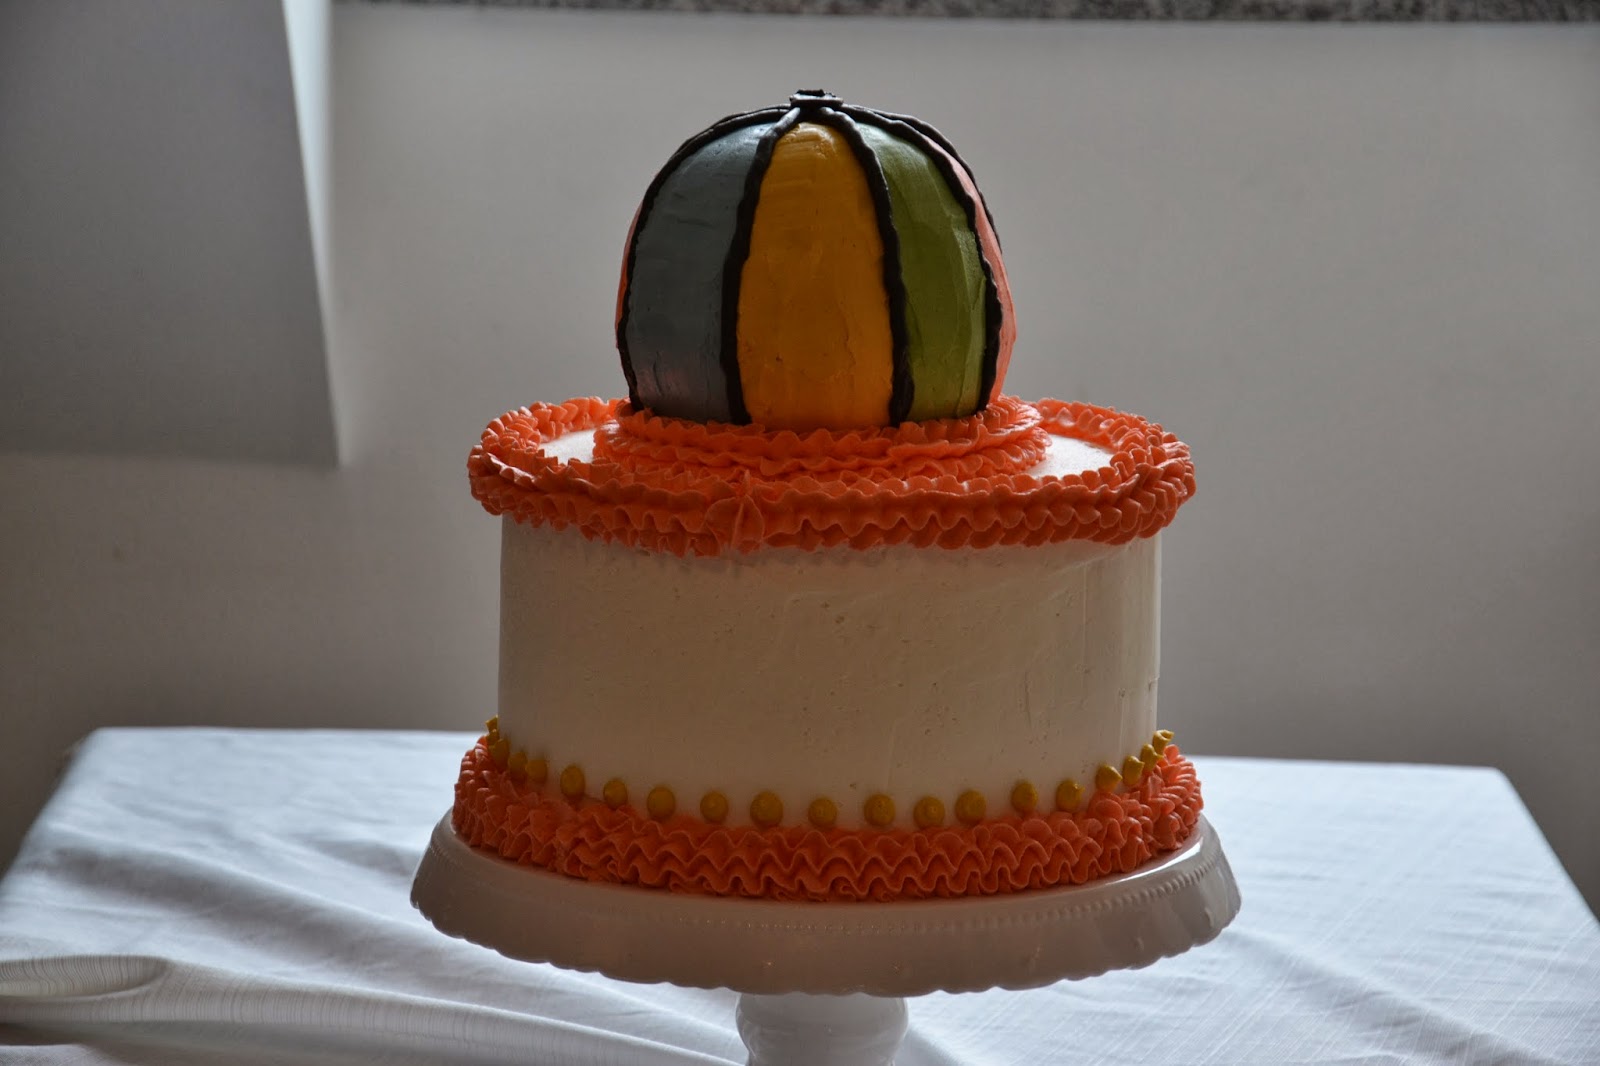
Base
Triple-Layer Lemon Cake, Lemon Buttercream & Lemon Curd Filling with Vanilla Buttercream Frosting
Ball
Chocolate Piñata Cake, Peanut Butter Chocolate Buttercream Filling with a Salted Peanuts Center and Tinted Vanilla Buttercream
Topper
Elephant Watercolor
There is more cake in this cake-aplooza than I can even comprehend. "Anything worth doing is worth overdoing" and I just might have done that!
I hosted a baby shower for a friend today...theme: Vintage Circus. The cake in my mind was nicer than the cake I produced. I've been working on a ball cake for several weeks now, and this rendition is the best so far - but it doesn't have that professional look (which makes sense because I'm not a professional; I'm a home baker!).
That being said, I do love the progress made in baking a really good-tasting cake, installing a very stable cake infrastructure, and having a finished product that is fun. I can't get over how much I love the elephant cake topper!
How this cake came to be...
I baked three 10" round layers of lemon cake. I used this recipe and had to double it. The lemon flavor is enhanced when using lemon yogurt though plain yogurt or sour cream are fine substitutes. Baking in 10" rounds required a longer baking time of 40-43 minutes. Hot tip: When baking is large rounds, along with vegetable cooking spray, cut parchment paper/waxed paper rounds to fit in the bottom of the pan - the cake will beautifully release in one piece.
While the lemon layers cooled, I baked the chocolate ball cake. I still don't have a ball pan! so I used my two smallest Bundt pans. The chocolate cake recipe is enough to bake both halves of the ball and almost a dozen cupcakes. I use a cupcake at each end of the open center to keep the piñata goodness contained.
Aaand, back to the lemon cake while the chocolate cake cooled. The filling was another opportunity to increase the lemon. I added a lemon buttercream layer then piped on a "wall" of buttercream around the edge of the layer. Inside the open "pool" I gently applied about 1/2 cup of lemon curd; I didn't want to integrate it into the buttercream but needed to spread it evenly across the open surface. Next up, the middle layer of cake and repeating the process.
After the cake was filled and stacked, I crumb coated the entire base. Due to the geography of this beauty, this step required a hefty amount of buttercream. At this point, the infrastructure needed to be in place. The four dowels (bubble tea straws) displace the weight of the ball cake resting on top of the supports - especially since the weight of the ball cake is spread across the 6" cake board. Bottom line: no cakes sinking or listing.
Into the cake fridge overnight...the stand plus the cake took up the entire space.
As soon as the base was in the fridge, the ball cake needed to get prepared. I trimmed the top of each half, plugged the bottom of the cake with a chocolate cupcake, and then placed it on a 6" round cake board. Peanut Butter Chocolate Buttercream was the perfect filling for this cake since I knew I wanted to add peanuts in the center. Why peanuts? Because the topper was an elephant! Get it? Peanuts...Elephant.... Very Vintage. Very Circus.
With just a little bit of batter left over, I baked a few cupcakes. The frosted circus animal crackers were a perfect little topper.
On the morning of the event, I was up bright and early to finish both components of this cake. I covered the base with my simple, sexy Vanilla Buttercream. I set that aside and stared at that unfinished ball cake. I scored the top of the cake into 8 equal sections. I eyeballed this step so it isn't exact, but it was close enough.
Tinting the white vanilla buttercream is more magic fairy dust than science for me. I have a lovely set of Wilton tinting gels; they're a dream to work with. Happy with the colors, I piped on color inside the lines of each section. I wasn't happy with the texture of the first two sections...so I took a risk. I wanted the buttercream to be smooth - so I took my smallest off-set spatula, stuck it in the hot running water, shook it dry-ish, and then ran it across the buttercream. The metal blade was still warm and melted the buttercream and the little droplets helped the frosting become smooth and almost shiny. I've never read about this, but figured "why not, it's cake and can be done and redone."
The black lines between the sections aren't smooth and steady; that's disappointing. I'll know for next time to make it more firm and controllable, especially when piping against gravity. All things being said, I learned so much from this cake.
Most importantly, these cakes were
Because this project was in conjunction with a big event, I elbowed my way onto our oldest daughter's blog with a guest post about the baby shower! Read about it here and take a quick peek at Marie's posts...she's smart and funny.
If you have questions, be sure to leave a comment - I promise to answer.
Without a doubt, I couldn't have pulled all of this together without my life partner. He asks the pertinent questions at just the right time while being supportive. I'm lucky. And I'm grateful.


No comments:
Post a Comment